
De Installaties Van Sedum in De Tuin Stock Afbeelding Image of levensonderhoud, openlucht
De meeste Sedums zijn vlotte groeiers. Als de planten na een jaar of vijf te breed zijn uitgegroeid, kun je ze in de herfst of in het vroege voorjaar delen. De gedeelde planten zullen het daaropvolgende groeiseizoen weer flink groeien en weelderiger bloeien. Slakken.
Sedum spectabile 'Brillant' Tuinplanten K2T
Unbox the sedum plant and remove the packing. Water the plant and place it in a partially shaded location to acclimate to its new environment for a day or two. Select a location for your new plant (s) based on the light and soil requirements of the plant. Dig a hole wider than the pot but not deeper. It is essential with sedums not to plant the.

Sedummatten zeer geschikt voor een bloeiende oprit Opritten, Tuin bestrating, Tuin
About the Sedum Species The sedum plant is one of the easiest-to-grow succulents. Be it bad soil or too harsh of sunlight; it is ever forgiving. It is a perennial plant bearing fleshy stems that are pretty thick. The flowers are primarily star-shaped. A sedum plant is also called stonecrop. This variety looks extremely coy and beautiful in any garden design. The best part is that sedum care.

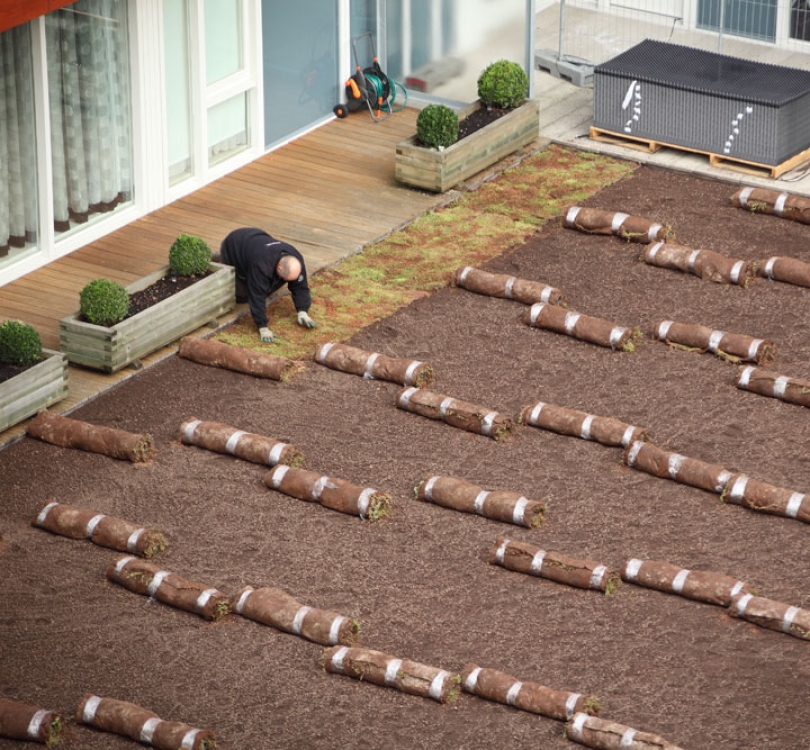
Volgroeide sedummix matten Groendaktotaal
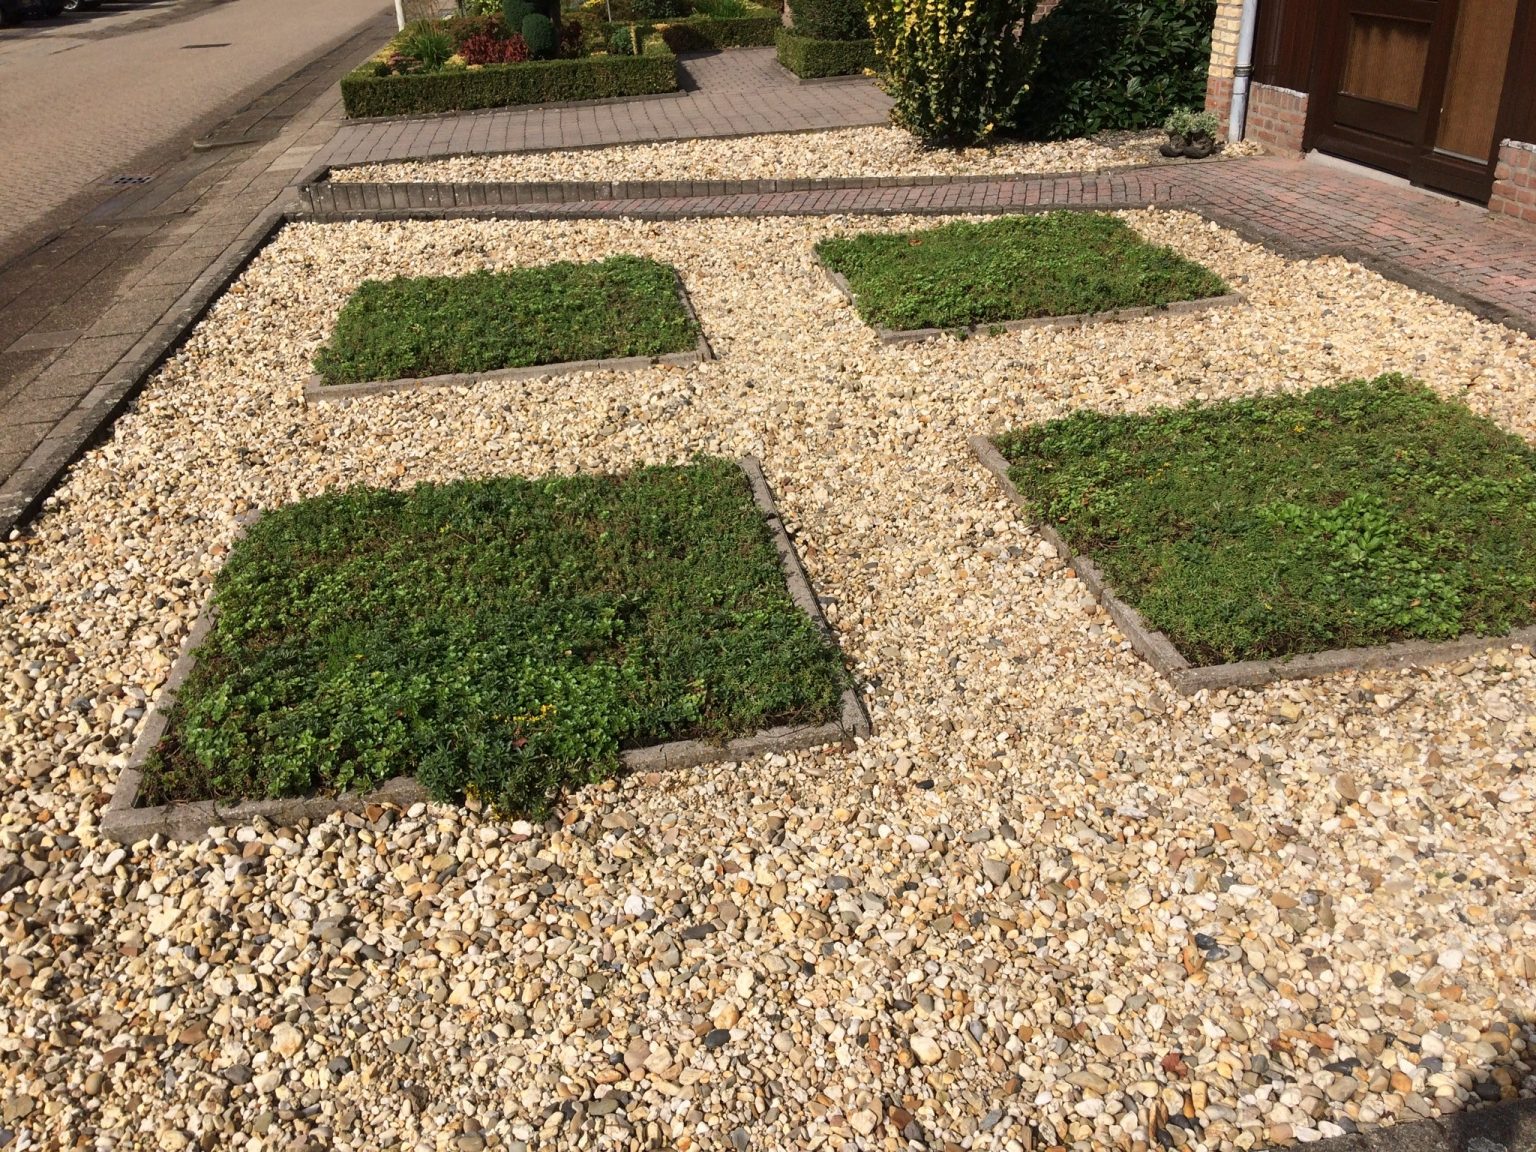
Wel eens gedacht om sedum in uw tuin te leggen? Onze sedummatten zijn uitstekend te gebruiken als bodembedekker in de tuin. Sedum is een groenblijvende en makkelijke plant. Doordat de matten dicht beplant zijn heeft onkruid minder kans en hierdoor heeft u minder onderhoud aan uw tuin. Er hoeft niet meer gesnoeid, geschoffeld en gewied te worden!

Winterharde 'SedumMix' Planten, Cactussen tuin, Tuinbeeld
Plant the roots of sedum just below the soil surface. The crown of the roots, which is where all the roots come together and the plant will grow should be at or above the soil level. Spread the roots out when planting, making the planting hole a bit wider than it is deeper. Autumn Joy Sedum.
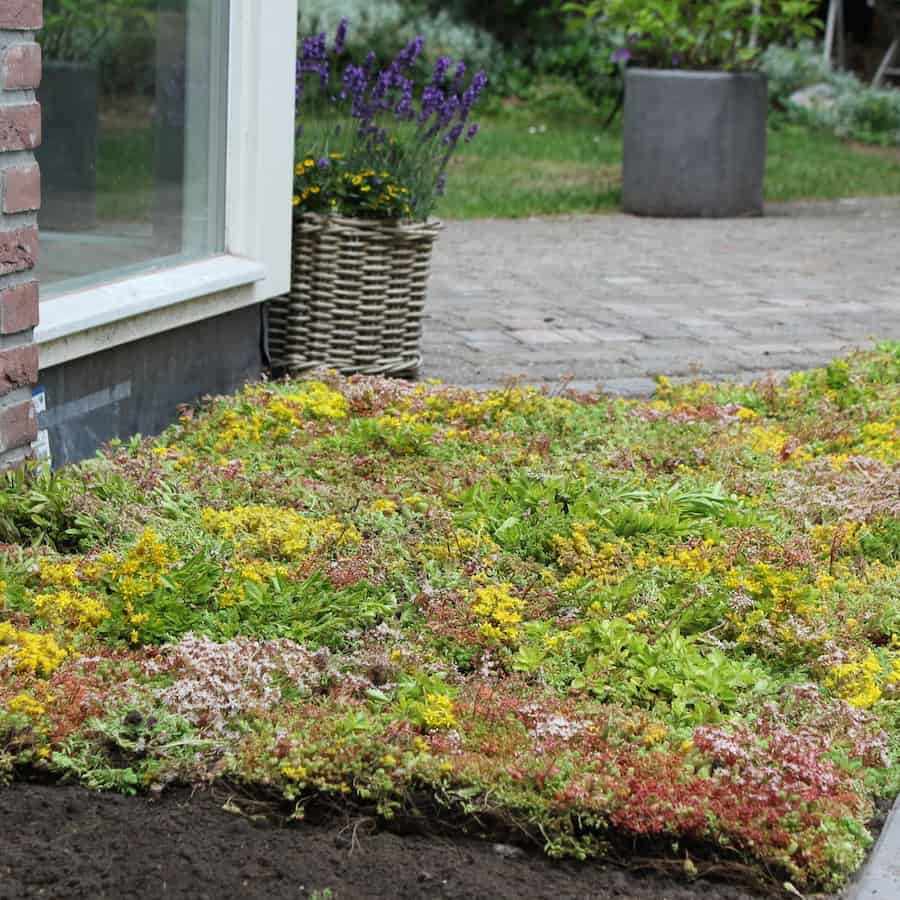
Totaalsysteem Sedum bodembedekking Groenbedekking
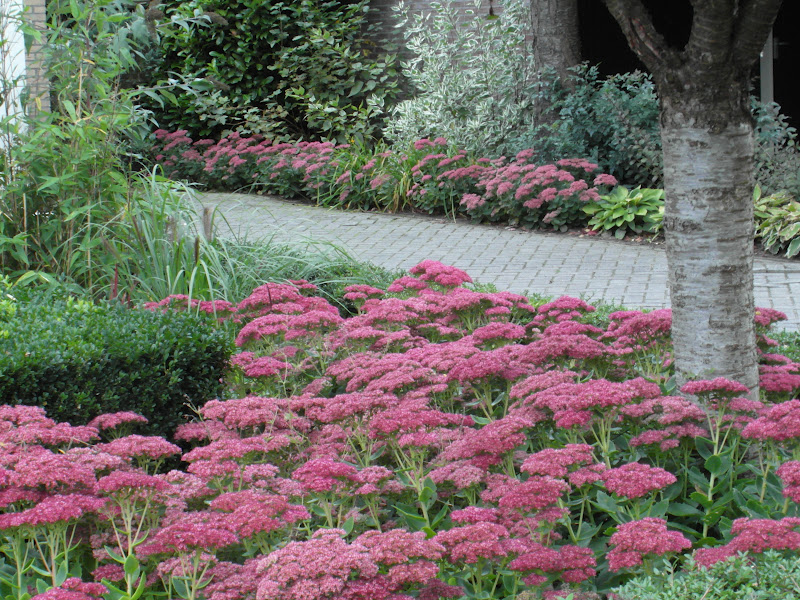
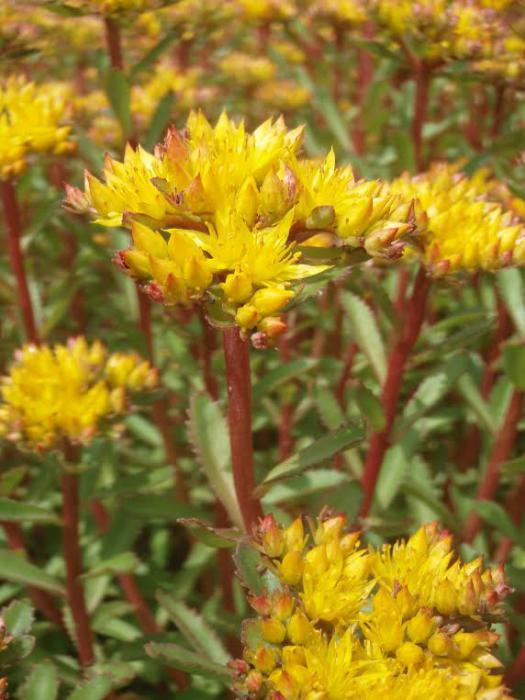
Sedum staat in vrijwel iedere tuin en is natuurlijk ook steeds vaker op het dak te vinden. Het is een makkelijke plant die niet veel aandacht nodig heeft of hoge eisen stelt. Droge grond, natte grond, zon of schaduw: het is altijd goed. Het bodem bedekkende plantje sedum, of vetkruid, kan dus overal en is ook een leuk alternatief voor gras.
kiekplaotiesenzo Sedum in de voortuin.....
PLANTING & CARING FOR SEDUM. How to plant: Choose a sunny spot that receives at least 6 hours of full sun a day. Follow these steps and space 4-28" apart, depending on the type and variety. Loosen soil in the planting area. Add sand, grit or perlite if the native soil is poorly draining.

Sedum reflexum angelina Hydrocultuur planten
Space plants between 6 inches and 2 feet apart, depending on the variety. Low-growing sedums will readily spread to fill any gaps, while upright sedums tend to stay more compact. Planting full plants or divisions: Dig a hole deep enough so that the top of the root ball is level with the surface of the soil, then place the plant in the hole and.

Sedum is een ideale bodem bedekker. Bodem, Tuin, Tuin inspiratie
Spring or summer is the best time to sow the seeds. Use a well-draining soil mix. Sow the seeds on the soil surface and gently press them down. Keep the soil moist until the seeds germinate. Provide a consistent temperature between 65 and 70 °F (15 and 21 °C). The seeds usually start to germinate after 2 to 4 weeks.

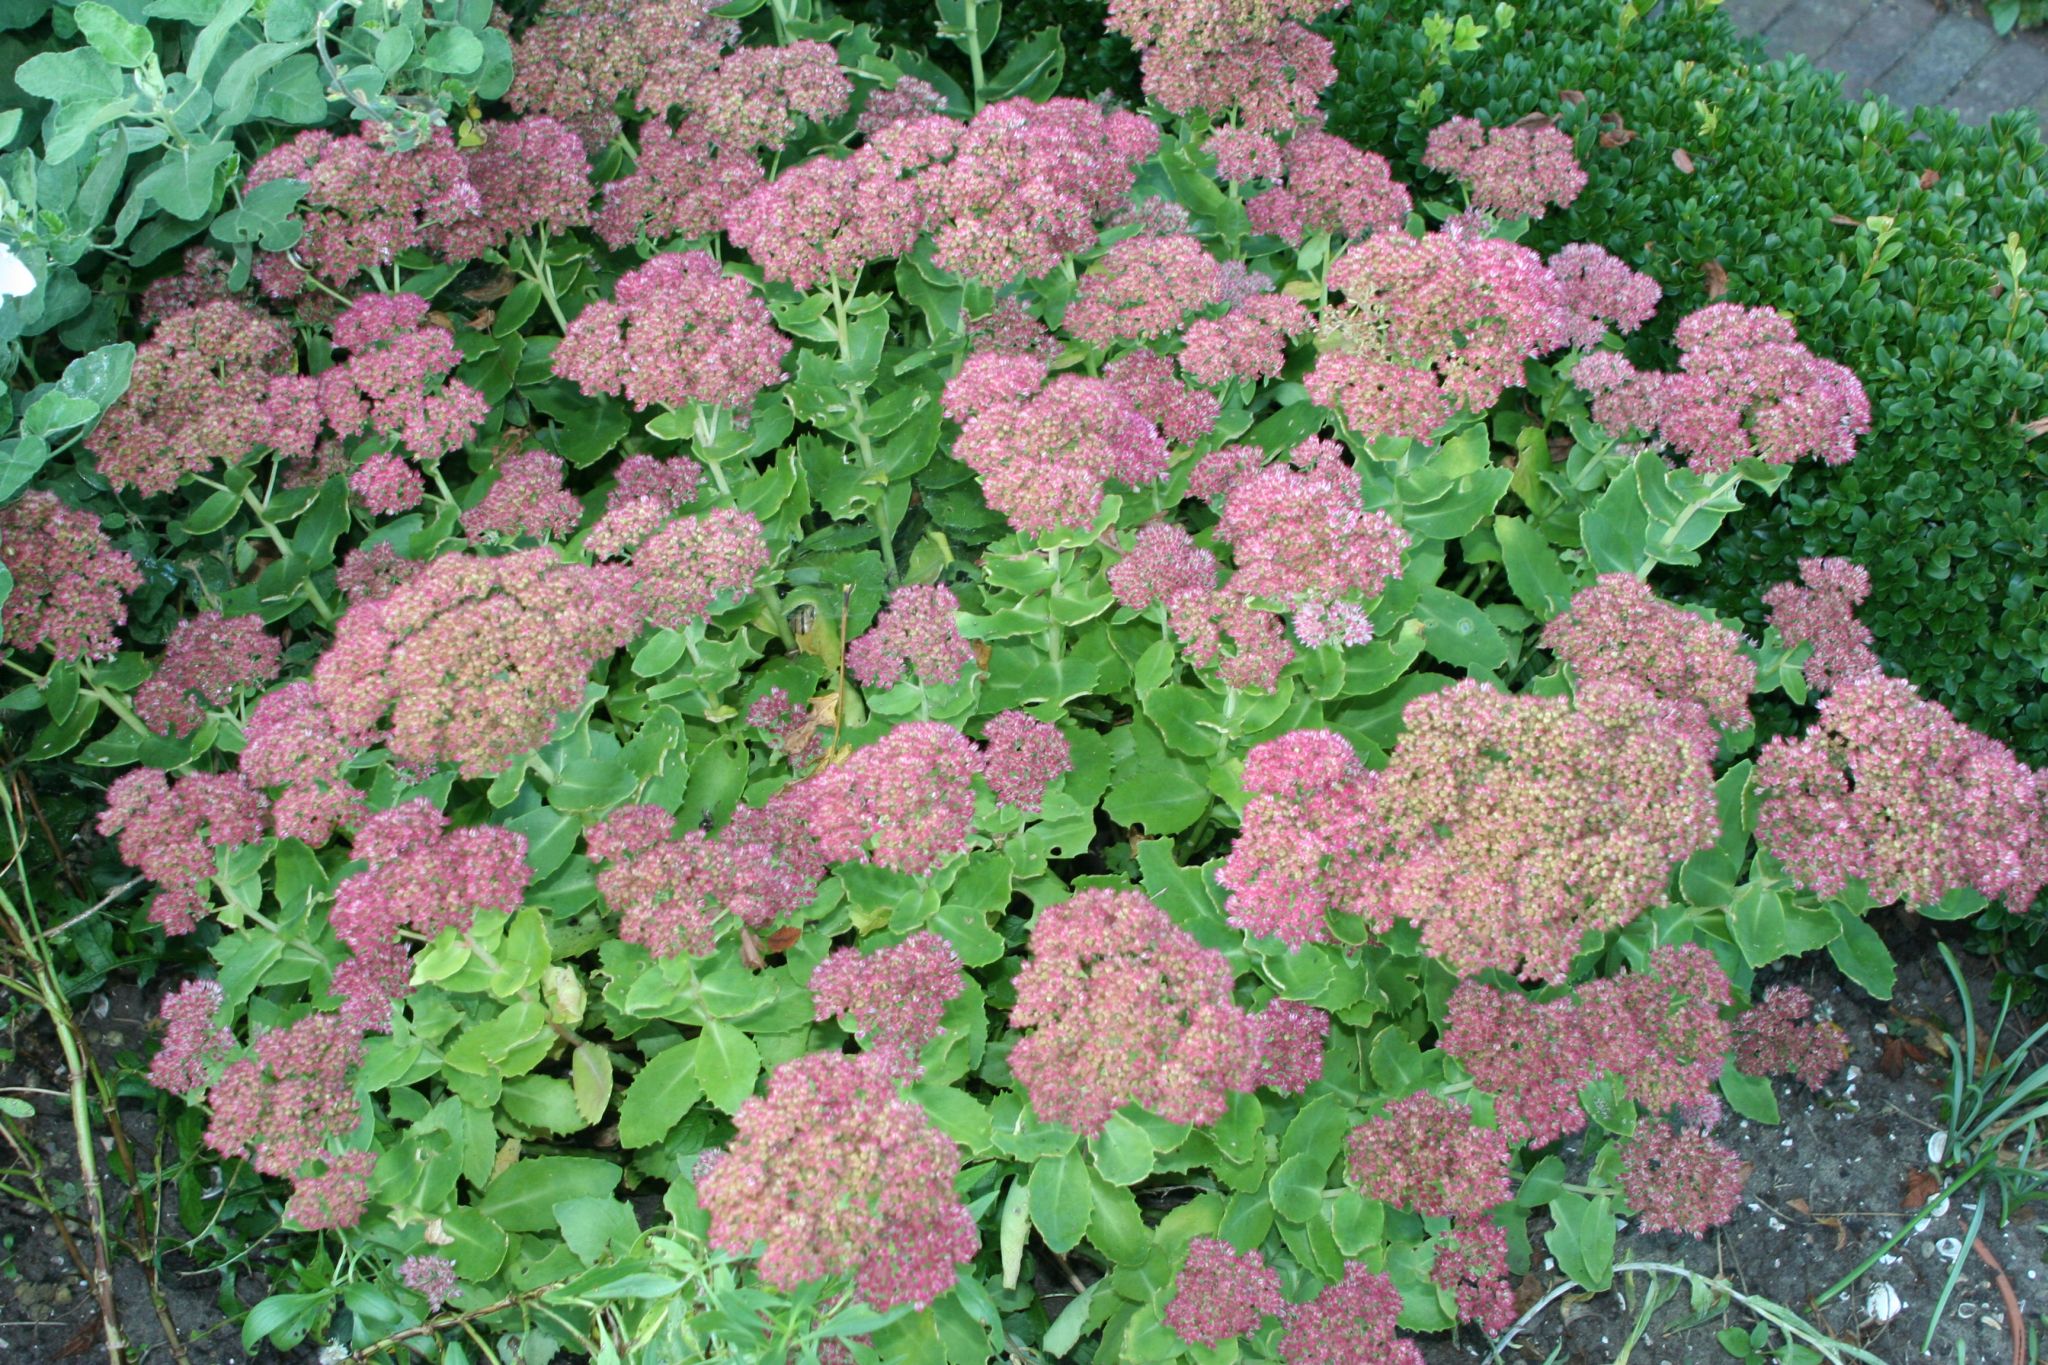
Sedum Prominent (spectabile Sedum) in De Tuin Stock Foto Image of nave, sluit 76074110
Propagating Sedum from Cuttings. 1. Cut sections with 3 or more leaves into 3 to 4-in (7.6 to 10 cm) pieces. Using pruning shears, cut off well-grown pieces at the stem. Remove 2 of the leaves that are near the bottom to expose their nodes, the places where the leaves connected to the stem. [12]

Sedum voor in de tuin Easy Sedum
To propagate sedum by stem cuttings, choose a healthy stem that is preferably not flowering with 4 or more leaves. Using a clean, sharp knife or pair of snips, clip the stem. Pull off the two lower leaves and clip off the flower head if the plant happens to be flowering. Leave a few leaves on the stem.

Tuin met paarse sedum bloemen. — Stockfoto © Debu55y 169231700
With clean, sharp pruners or a knife, cut a 4- to 6-inch piece from a healthy stem. Remove the bottom leaves. Insert the cutting in a 4-inch pot filled with soilless potting mix. Water it well and keep it evenly moist. After a few weeks, you should see new growth, which indicates that the plant is rooting.
Sedummatten voor in de tuin Makkelijk sedum aanleggen!
Sedum varieties vary in height. The smallest are just a few inches (8 cm.) tall, and the tallest can be up to 3 feet (1 m.). The large majority of sedum varieties are shorter, and sedums are frequently used as groundcovers in xeriscape gardens or rock gardens. Sedum varieties also vary in their hardiness.

Sedum, multitoepasbaar in een handomdraai GroenVandaag
Sedum grows best in full to partial sun, although it adapts and survives with little issue in partially shaded areas. For strongest blooming, plants should be located in an area that receives a minimum of 6 hours of sunlight. Although it can flower in partial shade, the bloom cycle will be longer and stronger the more sun the plant receives.
Zalige zomer met sedum in de tuin of op het dak Groenpalet
The perfect temperature will depend on your specific sedum species, but most indoor sedum should be kept at 60 to 70 degrees. Anything lower, and your sedum will go dormant until it feels the temperature heat up again. Soil: If the soil is too moist, or if you water your sedum plant too much, you run the risk of rotting your sedum plant. A well.
Sedum in de tuin EcoRoof
The History Of Sedum . The name Sedum derives from the Latin word sedo, which means "to sit." They are native to Asia, Europe, North Africa, and Mexico, with a few being native to North America. Sedums have been popular as garden and conservatory specimens since the early 1900s, although collectors have been using them since the 1800s.
